Wednesday 26 July 2017

A Cossack Raid: a Pike and Shotte scenario

After a bit of a lull, the Eastern Renaissance collection got onto the table this week.  Painting commitments for the up-coming Lance & Longbow game at Britcon meant that the second Soldatski unit is still not finished.  Also, the reorganisation and painting of the various armies to incorporate new units has been on hold.  Therefore my scenario used some of the existing units and concentrated on trying out a few new rule ideas for chevaux de frise and wagons.  This was due to me looking through the 'Sword and Flame' rulebook and finding the section on portable obstacles and being inspired to have a go at knocking together some examples.

The scenario revolved around a Cossack raid into the southern Muscovite provinces.  Local defence forces were gathered and marched to the area.  These were all second rate units similar to militia. Messages had been sent to the Provincial capitol requesting support from the main army, but for the moment, the locals were on their own.  The Muscovite force consisted of

2 units of Noble Levy
2 units of urban streltsy
2 units of border muskets
1 unit of dismounted border dragoons.

2 pieces of artillery were available, a large gun in a redoubt by an old watchtower and a medium gun with the infantry.  All the infantry were shielded within gulay gorod and chevaux de frise, erected within site of the Cossack camp.  The Muscovite orders are to observe the Cossacks and try and contain them within the immediate area until the main army arrives.  All the streltsy and border musket units are 'small' as rated by Pike and Shotte; the dragoons are standard.  The noble Levy units are large.

The Cossack force has
2 units of horse
2 units of registered moloisty (Muskets only)
3 units of moloisty (spears and muskets)
1 unit of 'adventurers'
3 light guns.

Two of the moloisty regiments are large, the third is standard; the registered moloisty are standard and the 'adventurers' are small.  The cavalry are both standard.

The Cossack commander has orders to carry out a deep reconnaissance and , seeing that he outnumbers the Muscovites in infantry and assuming his men are of better quality has decided to move out of his wagon laager and attack the units behind the chevaux de frise.

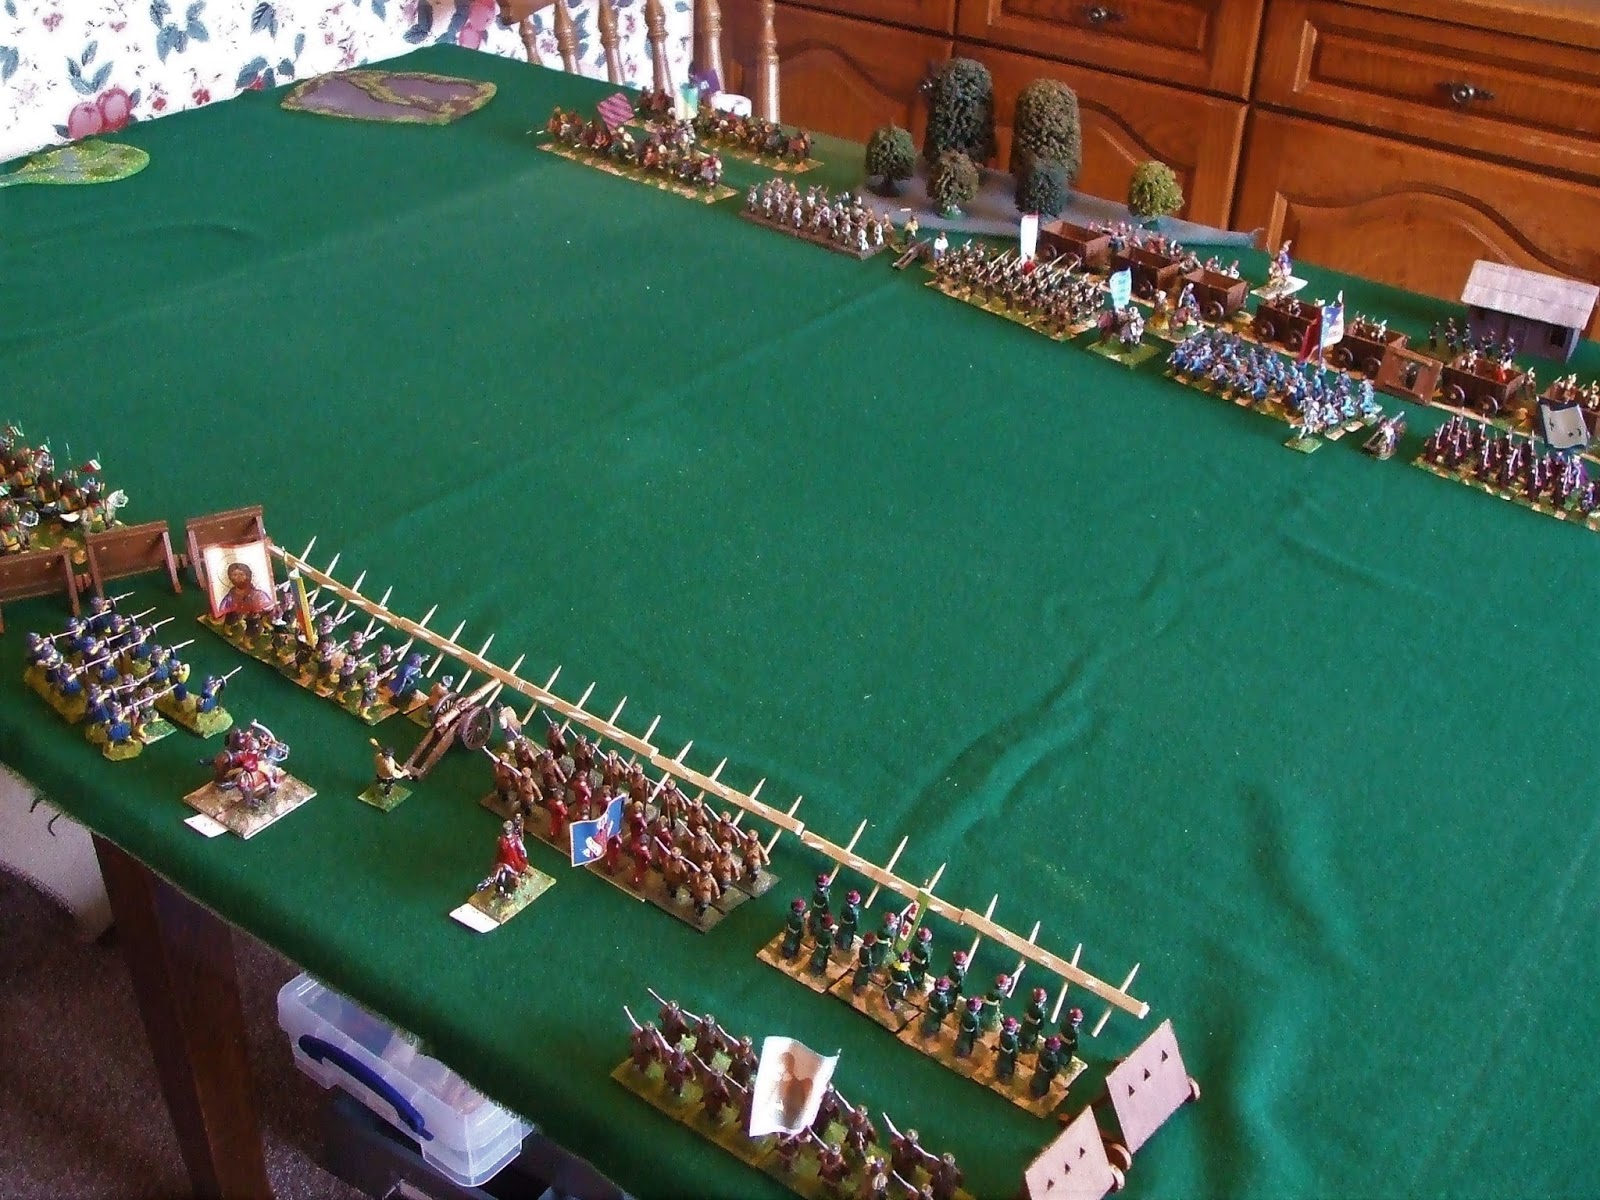
The general table layout


A couple of close-ups

The Cossack infantry prepare to advance

The Muscovite border troops await the attack
The game began with a general advance by the Cossacks, with their cavalry covering their right flank.  The Cossack cavalry commander's brief was to try and avoid melee, but harass the Noble Levy, hoping to disorder them with missile fire.  This he signally failed to do as the Noble Levy swept forward in a headlong charge and was on him before he could give the order to evade.  The ensuing melee was decidedly one-sided with the Cossacks being overwhelmed and driven back in rout.  Sweeping forward the Noble Levy then dispatched the supporting cavalry unit in the same way. In no time at all, the Cossack cavalry had ceased to exist.


Battle is joined
The Cossack cavalry commander flees with the remains of his force
This setback forced the Cossack general to order the right of his line to turn to face this new threat, whilst the remaining two units continued to advance on the chevaux de frise.  Ignoring the first volleys from the Muscovites, they closed to short range before firing.  Although heavy casualties were inflicted the Muscovite line stood firm and returned the volley, supported by the medium gun. The moloisty were shaken and disordered and unable to charge.  To their left the registered moloisty closed up to the chevaux de frise and meleed the urban streltsy defending it.  The streltsy's berdische axes struck home to good effect, inflicting heavy casualties and forcing the Cossacks to rout.


The moloisty suffered further casualties from the fire of the border dragoons and the artillery and broke to join in the rout.

On the Cossack right, the infantry had been charged by the second Noble Levy unit.  Their defensive fire was weak, but they managed to hold the initial impetus of the cavalry and eventually drive them off.  The relief was only temporary, as the other Noble Levy unit, having recovered from the brief melee with the Cossack cavalry, now charged them.  Already weakened by their first melee, the infantry proved unable to prevail a second time and broke, running for the safety of the wagons.

Success before defeat
With half his infantry units routing and his cavalry driven from the field, the Cossack general had no choice but to order his remaining troops back to the wagons.

The scenario did not work out as planned, with little actual combat at the chevaux de frise.  A combination of extreme dice results in the initial cavalry melee, taken with a miscalculation regarding the size of the units ( the large Muscovite Noble Levy units were just too powerful) led to the Cossacks having little chance to advance.

After lunch Steve and I set up a different scenario with no cavalry; limiting ourselves to a straight infantry attack on the chevaux de frise.  This proved a more balanced affair with several melees across the obstacles.  In the end the better quality and numbers of the Cossacks prevailed.

Muscovite defenders

Cossack attackers
The streltsy driven back
The chevaux de frise rules we used were

1  The chevaux de frise is an obstacle, but does not provide cover from missile fire

2  Units attacking across the chevaux de frise take a disruption test before melee.  Roll a d6
            Raw disordered on 4-6
            Trained on 5-6
            Elite on 6

           (units with pike/spear add 1 to their score)

           If a unit is already disordered before it takes the test and fails, it takes a casualty

3   A spear/pike unit holding a chevaux de frise strikes first in a melee with a non spear/pike  armed        unit; using half usual number of melee dice (rounded down) to calculate hits.  These are resolved        before normal melee procedure is followed.

4   An undefended chevaux de frise can be destroyed by a unit standing by it for one turn and                    carrying out no other action (including firing and rallying)


Sunday 23 July 2017

Hope returns

This week saw the conclusion of Steve's AWI scenario.  Once again, here is the map of the terrain.

Beginning on the American left, the anticipated British attack on Hope struck home.  There was no time for a defensive volley as the two sides were immediately locked in a bloody struggle.  First the Americans gained an advantage, but the British then hit back.  Possession of the boundary wall was bitterly contested, but eventually, as if by mutual consent the two battered units fell back to recover; honours even.  However, there was no rest for the British as they were hit by a volley from a militia unit sent  by Clayton to support the troops in Hope.  Undeterred, the British turned about and fired such an accurate volley that the militia were driven back over the ridge.  Taking advantage of this diversion, Appleton moved the defenders of Hope up to the boundary wall and their volley tore great holes in the British ranks.  The cumulative effect of their casualties proved too much for the British infantry and they broke, running up the road towards their lines.  With the immediate threat to Hope removed, Appleton re-deployed his artillery to cover his left, particularly the open ground beyond the wood.  It was provident he did so as the militia riflemen came tumbling out of the trees, followed closely by the British Grenadiers.  The rifles struggled to reform on the ridge, sheltered by (an admittedly nervous) line of militia.  They were heartened by the sight of the advancing grenadiers being shredded by two salvoes from the artillery and added two volleys of their own which drove back the grenadiers into the wood.


In the centre Von Bingen continued to push towards Feather Ridge.  His Hessian jaegers got the better of Clayton's riflemen, who were driven back over the ridge again, but could make no impression on the Continentals on the ridge.  Indeed, the jaegers themselves were driven back and once the fusiliers were exposed to the fire of the militia on the ridge they too fell back to rally.  The Hessian musketeers restored the balance by driving back the Continental infantry, but then succumbed to fire from the American artillery.  Neither side could win a decisive advantage and the battle swung one way and then the other.  Von Bingen tried to gain the advantage by advancing from the section of Hope he controlled up onto the ridge.  The grenadiers led the way, but moved only a short distance before they were swept by volleys from the troops Appleton had moved to cover the road to Philadelphia.  The musketeers following them met the same fate, both units falling back into Hope to rally.  An attempt by Clayton to eject the Hessians came to nothing as his militia could make no impression in the face of volleys and determined resistance.


On the American right Brown was experiencing mixed fortunes.  He had managed to regain control of the Mills House and his other infantry had advanced to support this.  However, his militia had been unable to stand against the fire of the British line battalions (Fraser's Highlanders in particular causing heavy casualties).  This left his right flank 'in the air' as the militia had fallen back to the ridge to rally.  To try and stabilise his front, Trimble's Light Dragoons wee ordered forward.  As they advanced they saw the troops holding the Mills House running from the building, driven back by deadly volleys from Arbuthnot's men.  Undeterred, they charged home on the leading British infantry and scattered them.


 With their blood up they galloped on, but met Fraser's Highlanders.  This unit provided a much sterner test.  Already disordered by their previous melee, the American  cavalry were jolted by a close range volley.  In the ensuing melee their reduced numbers proved decisive, defeated and driven back, a further volley from Fraser's ensured that they took no further part in the battle.


Back on the American left, Appleton, decided to advance his riflemen again to oppose Carruthers' riflemen.  As they moved forward Carruthers ordered forward his light dragoons.  Sensing an easy victory the British cavalry charged the American rifles.  The British cavalry had already suffered significant casualties and this proved decisive.  Against the odds, the rifles prevailed  and as the British fell back they were hit by volleys from the infantry holding Hope, totally destroying them.

This proved almost the end of fighting on this flank, as Carruthers' brigade had suffered well over 50% casualties.  For his part, Appleton was content to hold his position, most of his units having suffered significant casualties.

The decisive action took place on the opposite flank.  Brown was still trying to rally his militia units. Harrison had galloped over to try and help, rallying the former defenders of the Mill's House.  These now moved forward into the gap created by the departing Light Dragoons.  Brown's leading units now found themselves almost surrounded.  The leading unit of militia suffered casualties from Arbuthnot's men around the Mills House.  They were then sent reeling by a volley from the combined light companies.  As they fell back another volley from the Mills House totally routed them.  The other leading regiment was forced back by volleys from Fraser's and now Brown had all his remaining units in retreat.

Fortunately for the weary soldiers on both sides, gathering darkness now led to a cessation of hostilities.  Harrison had managed to hold his position, but his men had paid a heavy price, most units were below half strength in the ranks.  Clayton had performed well, holding back the Hessians and helping Appleton when necessary.

General Clarke, once he received the returns from his brigade commanders decided that at least a day's halt would be required to distribute ammunition, treat the numerous wounded and bury the dead.  Harrison was therefore able to fall back unhindered to the next blocking position.

A very close battle due to Steve's well-balanced scenario.  He tried a new version of the brigade morale which related to units lost, rather than accumulated damage points as previously.  This meant that we had more units available for longer. (In the end only six units in total were lost).  This seemed to avoid the sudden collapse of a wing which tended to decide the game.

Here are a few photos of the position at the end of the game

Clayton on Feather Ridge

Brown's shattered brigade

The American position by Hope

The gallant defenders of Hope
  

Tuesday 18 July 2017

Hope on the road to Philadelphia, an AWI scenario

Steve hosted the game this week and set up an AWI scenario.  This had the rebels falling back towards Philadelphia and taking up a defensive position on the Feather Ridge near the settlement of Hope.  The settlement itself sits astride one of the roads to Philadelphia.

Sketch map of table layout
When the scenario opens General Harrison has one brigade (Clayton's) in position on the ridge and the brigades of Appleyard (on the left) and Brown (on the right),  making their best speed along the roads to take up positions on the flanks.  Each brigade contains a mix of Continental and militia infantry and a gun.  Brown also has a unit of light dragoons (Trimble's).

Clayton's brigade in position on Feather Ridge

Carruthers' brigade on the British right advances on Hope

The pursuing British forces are also divided into three brigades (from left to right, Arbuthnot, von Bingen and Carruthers).  Harrison's orders are to stop, or at least delay the British advance.  Clarke, the British commander has orders to press on to Philadelphia at his best speed.

Appleton's men defend Hope

Both Appleton and Brown have positioned their riflemen in the woods on their respective flanks and these began a harassing fire as the British troops began to enter the table.  For their part, Carruthers and Arbuthnot deployed their light infantry forward to try and screen the regular line infantry.  Whilst Arbuthnot's converged light companies made steady progress and forced Brown's riflemen to fall back through the woods, Carruthers' riflemen struggled.  When the fire from rebel skirmishers was supplemented by volleys from one of Appleton's Continental battalions increasing casualties forced the riflemen to fall back to rally.  Carruthers had to call on his elite grenadier battalion to 'steady the ship' and their line of steadily advancing bayonets 'encouraged'  the rebels skirmishers to fall back.

The Hessian advance
In the centre, Clayton had kept his skirmishers close to the ridge, so they were unable to hinder the deployment of Von Bingen's Hessians.  Nevertheless, the obstacle of the woods slowed the advance of the Hessian line battalions and for a time the jaegers were unsupported.  This did not seem to concern their Colonel, who pushed forward aggressively, forcing Clayton's skirmishers to withdraw when their losses mounted.  Harrison took the opportunity to trot over to Clayton and 'suggested' that perhaps an advance by one of his line battalions may force the jaeger back.

The converged light companies
Brown's skirmishers had by now been forced back by the converged light companies and the Continental battalion deployed in and around the Mills House was being attacked by two regular line battalions from Arbuthnot's brigade.  Brown had intended to make a stand on the ridge, but saw that his front line was unsupported and therefore ordered his two militia battalions forward.  His artillery remained on the ridge where it had a good field of fire.

The British on the outskirts of Hope
Clarke's plan was now becoming clear to Harrison (or so he thought).  The main effort seemed to be towards the settlement of Hope.  Von Bingen had committed his grenadiers and musketeers   to a frontal attack whilst Carruthers had two battalions advancing down the road, with his light dragoons covering the area between the road and the wood.  The first to suffer were the Light Dragoons.  They were staggered by a volley from the rebels in Hope and then sent reeling backwards by further volleys from the militia on the ridge.  As the hapless horsemen attempted to rally they suffered further casualties from Appleton's artillery.  For the time being they were out of the battle.  Appleton's artillery now turned its attention to the infantry columns approaching Hope.  As the range shortened the nearest unit suffered heavy casualties and was forced to fall back to rally.  General Clarke galloped across to assist Carruthers in re-establishing order in his brigade.  The second battalion sensing that speed was of the essence, increased its pace and outflanked the battery before it could reload.  Turning smartly to its flank it now threatened to drive the defenders from the lefthand part of Hope.  In response, Appleton moved two battalions over to counter this threat, though this left a single militia battalion to hold the ridge.

The imminent flank attack on Hope
Von Bingen's grenadiers approached the righthand sector of Hope and  began to fire volleys at the militia defending it.  At first their fire seemed to be having no effect, other than to sends chips of wood flying from the cabins' walls.  However, when a musketeer battalion added their fire the weight of shot proved decisive and the militia were seen streaming back up and over the ridge.  Clayton responded by sending forward one of his battalions to contain the Hessian attack

Clayton sending forward reinforcements
It was at this point that the day's gaming came to a halt.  The action was nicely balanced, with a slight edge to the British.  However, a couple of volleys could change everything!

Saturday 8 July 2017

The Road to Smolensk - a Napoleonic scenario using Shako

This week Steve and I returned to the Napoleonic era with a game set during the 1812 Russian campaign.  The scenario has flanking attempts by each side meeting head on.  The forces engaged are roughly equal (28 battalions of infantry and 8 regiments of cavalry supported by 6 batteries of artillery). Here is a map of the table layout.

A roll of the dice decrees that Steve will command the Russians under Wittgenstein, whilst I take the role of St Cyr, the French commander.  St Cyr commands a mixed nationality force (mainly Wurttemburg, Italian and Westphalian) and my plan was to attack on the wings and then break through in the centre.  Steve came up with the same plan, so it was likely to be a bloody affair.

Bonfanti's Italian division holding the Church Heights

Neverovsky's Division in and around the village of Monstoye on the Russian left
 Whilst the artillery exchanged shots in the centre the divisions on the wings moved forward.  On my left Bianchi's cavalry covered the left flank of Och's Westphalian division as it advanced on the village of Ploskoye. ( Lacking local knowledge St Cyr had identified the objective as 'Ivan'  ).  Bianchi was opposed by Glukov's cavalry division and had the better of the initial contact, pushing back the Siberian Uhlans and the Mounted Eger.  Although the Italian Chasseurs rallied back to reform, the Westphalian Hussars swept on and charged the Alexandrinsk Hussars.  Although they were again successful they now found themselves isolated and were first subjected to an accurate artillery fire before being overwhelmed by the Polish Uhlans.

On the opposite flank, Marchand's Wurttemburg division, supported by Stockmayer's Cavalry division advanced on Monstoye (identified in the French orders as 'Boris').  Their advance was hampered slightly by a marshy stream.  In addition Neverovsky's division supported by Siever's cavalry, had already occupied Monstoye and advanced to meet them.  Marchand's skirmishers were a little too bold and   fell victim to a band of marauding Cossacks.

They in turn were driven back by Stockmayer's cavalry, as were the under-strength Riga Dragoons.  However, the Moscow Dragoons restored matters, supported by the Vladimir Uhlans.  Both cavalry divisions now fell back to reform, leaving the field to the infantry.

The Westphalian Hussars defeat the Alexandrinsk  Hussars
In the centre, Berg's division, supported by Raevsky's Grenadier Division began to advance towards the Church Heights.  St Cyr hesitated to commit Lecchi's Italian Guard division before he was sure where the main attack would fall.  He was observing the effect of the artillery fire from the Church Heights on Neverovsky's infantry and was confident that Marchand would be able to defeat his weakened  opponent.

Bonfanti's Division move forward 
On the left Ochs was now attempting to capture 'Ivan', Kamensky's infantry having occupied the village just before the Westphalians arrived.  The first attack was driven back with heavy losses and as the battalions re-grouped for a second attack, they cam under fire from the Russian artillery reserve which Wittgenstein had deployed to support Kamensky and Berg.  The cavalry melee resumes on Och's left.  Although the Italian Chasseurs are successful against the Alexandrinsk Hussars, the Polish 10th Hussars are totally defeated by the Siberian Uhlans.  The effect of fleeing Poles on the remains of Bianchi's command are dramatic as his remaining units fall back in retreat.  Ochs needs help quickly.  St Cyr amends his plans.  Lecchi is now to support Ochs by attempting to stem Berg's advance.  Ochs is to fall back, covering the French flank.  Bonfanti is to advance, maintaining the line and supporting Marchand.  As these orders are put into operation bad news arrives from the right flank; Stockmayer's cavalry were falling back.   The Baden Hussars had led the way, attacking the under-strength Riga Dragoons.  Their confidence was misplaced as they suffered such heavy casualties in the melee that they were finished as a fighting force.  The Dragoons followed up by sending the Prinz Adam Cheveauleger tumbling back in total disorder to play no further part in the battle.   To prevent his remaining units being overwhelmed, Stockmayer decided to pull them back. Hoping that Marchand's infantry and the artillery would break up any further cavalry attacks.  This meant that Marchand's force was now divided and his push towards 'Boris' weakened.  Nevertheless, with the Fusiliers Van Neubronn leading the way, the Wurttemburg infantry were pushing back Neverovsky's men.

Sievers' cavalry push forward
In the centre  Lecchi and Bonfanti were establishing a line, ready to face the Russian attack.  The artillery on Church Heights continued to inflict casualties on the advancing Russians, but the decision would be made on the flanks.  Wittgenstein had sent an aide with urgent orders for Glukov to press home his advantage and sweep towards the Church Heights.  Pressure was mounting on Ochs' left flank, particularly when Kamensky's infantry advanced round Ploskoye.

Kamensky's infantry open fire
 Volleys from the Kexholm and Suzdal regiments swept away the 2nd battalion of the 4th Infantry and the 2nd Light Infantry, meaning losses in Ochs' division had reached 50%.  With more infantry advancing on his wavering battalions and cavalry threatening his rear Ochs faced total defeat.  He had no choice other than to withdraw.  Sending as aide to St Cyr with his plans he attended to the difficult task of trying to extract what remained of his division from the maelstrom of fire around  the village.

The infantry of Marchand and Neverovsky clash
St Cyr received Ochs' report and realised that the day was lost.  His left was in tatters and although the centre was holding the attack on the right had ground to a halt.  At least Marchand's men had driven off a reckless charge by the Vladimir Uhlans, but there still remained two units of Dragoons and Cossacks to cause problems.

The Wurttemburg infantry drive off the Russian cavalry
An enjoyable game with the result revolving around a couple of decisive melees.  I must admit that my caution in committing the reserve meant that I did not have the troops in the right place when they were needed.  Also, it may have been better putting Ochs's division on defence orders and allowing his artillery to 'soften up' Kamensky's attack, rather than advance to meet him.  All lessons for the future!