Saturday 30 April 2016

Rage at the Armouries and a short break

The busy schedule continued with a visit last weekend to Leeds for the Rage event which showcased the Hundred Years War to mark the move of the Agincourt diorama to Leeds.  Several clubs attended with games and a good range of photographs can be seen on Will's blog.  The Lance & Longbow Society had two games on show;  Simon Chick's Agincourt game and Steve's Bauge game.  He had adapted the scenario to use our version of Lion Rampant so we could offer it as a participation game. Happily we had several 'willing volunteers'.  The two run throughs gave differing games.  In the first Clarence led the English knights across the bridge into Bauge and perished as in history.  The supporting force led by his illegitimate son was crushed by the French.  Fortunately, the archers led by Salisbury managed to drive off the Scots and recover Clarence's corpse.  In the second game, Clarence survived, his unit destroyed the Scots in Bauge almost handed and Salisbury arrived in time to make sure the Scots reinforcements were driven off.  The French were fought to a standstill by Clarence's son and so the result was a clear English victory.  Thanks to Dave, Will, Steve and Martin for making the game such a success.

Layout for the game

Scots in Bauge

Scots in Bauge form up

Clarence prepares for battle
During our short break in the Aylesbury area we visited Bletchley Park.  This was a fascinating day, with plenty of things of interest.  Having watched the film "The Imitation Game" the display on the 'Bombe' was particularly interesting. Museum staff explained the processes involved in trying to determine the settings of the Enigma machine.  One was left with admiration for the skills of Turing in envisioning how such a machine could be built.  If you get the chance the museum is well worth a visit and your ticket will allow admission for twelve months.

Enigma machine

Bombe machine used in the film

Set used for the film set up in Bletchley Mansion
We also had time to visit Oxford and whilst there went to the Pitt-Rivers Museum.  It is a treasure trove of artefacts from around the world.  On the top floor is a collection of arms and armour.  Amongst the exhibits was a grenade launcher from the 18th century.


I had never seen one before and assumed that any grenades used were thrown by hand.  On the ground floor are several cases with models of eighteenth century ships.


On the way home we stopped at Coughton Court a Tudor house with links to the Gunpowder Plot. The Throckmorton family have lived there for 600 years.  Among the exhibits is a relic from Edgehill


Monday 18 April 2016

Bucklebury follow up

In the comments on the post concerned with the Bucklebury scenario, Chris asked if I had a photo of the battlefield set up.  Usually I do, but on this occasion matters were a little rushed and I didn't get round to it.  However, I have drawn a sketch map (below) which I hope will fit the bill.

Also, just in case anyone is interested, here are scans of the amendments which Steve and I use with Pike and Shotte.


The number of figures for Small, Standard and Large units are 24, 32 and 40.  There is an element  of 'adjustment' necessary to get 3:2 and 2:1 ratios but only the odd figure.

Sunday 17 April 2016

My first Salute

I have been told several times over the years, "everyone should go to Salute at least once".  Well this year the stars aligned and (with Steve's computer skills and ability to spot a bargain on the train ticket site), it came to pass.  A very early start enabled us to catch the 5.55 train and three hours later we was in the Excel venue.  On the way Steve and I experienced one of those "I don't believe it" moments.  TfL (Transport for London) had closed the Circle Line on the London Underground, meaning we had to make a detour via the Northern and Jubilee lines.  As we completed our trek through the connecting corridors at Waterloo a train was standing at the Jubilee line platform and an open carriage door was facing us.  We jumped on and before we bagged the last couple of seats the doors had closed and we were off.  It was then that I noticed who I was at next to, Phil Olley who I had known for a good number of years!  Not only had we caught the same carriage on the same train, bur it was his first Salute too.  Talk about coincidences!  The journey flew by as we chatted and fortunately we also managed to chat during the day at the show.

Steve and I were helping out on the Lance & Longbow stand, but both of us managed to find time to look around the games on offer.  My particular favourites, (in no particular order), were
Bill Gaskin's Seven Years War display game


The town was stunning with masses of detail, but it formed only part of an extensive display.  The figures also provided plenty of opportunities for inspiration.


Next this was a Peninsular War demonstration game by Ian Smith, using 40mm figures.  Again stunning to look at.

French artillery fire on the Spanish infantry

British infantry preparing for enemy cavalry 

Major Sharpe attempting to hold back the French cavalry
A third large scale game was that put on by the Crewe and Nantwich Club, "The Bloody siege of Bristol".  It had the town, port and earthworks.  The game was so extensive I couldn't get an overall shot, so here is a selection of views.


There were a lot of games on a smaller scale, first Mansfield Wargames Club with Gorodetschna from the 1812 campaign, a particular interest of mine.  They were demonstrating a new set of rules which they are developing and they were very friendly and happy to chat about the mechanisms they are using.


Loughton Strike Force had a participation game based on the Russo-Finnish war 1940.


 From Scandanavia, Dalauppror with Foteviken 1134


Essex Gamestar had a demonstration game based on the Tet Offensive which had masses of detail


The Lance & Longbow Society game was Hastings and was put on by Rob Broom


Gripping Beast had a medieval game based on the struggles between the Teutonic Knights and Rus


Well, what were my thoughts on Salute?  First, it is huge, far larger than any other show I have attended.  There were lots of games on view and in spite of making a 'hit list' before I travelled, there were several I didn't get around to seeing.  What I did see gave me plenty of inspiration for future projects.  There were plenty of traders and I should imagine that almost anything a wargamer wanted would be available somewhere.  The organisation seemed very efficient  and there was plenty of room for the crowds who attended.

On the down side the venue is very hard on the feet and noisy, but given the location that is inevitable.  Would I go again? well, not every year, but I like to think I will attend again at some stage.  Many thanks to Dave, Lynne, Rollo, John, Neil and Steve for their company on the day.


Wednesday 13 April 2016

Bucklebury, An ECW scenario for Pike and Shotte

We are back in Kelhamshire this week, with the ongoing campaigns of Sir Victor Meldrew and Lord Melchett.  Sir Victor had arrived in Bucklebury expecting to find the convoy of artillery and provisions ready to leave.  Instead he found wagons, guns, supplies but no draught horses.  Even worse, his scouts reported that a Royalist force under his old foe Lord Melchett was heading towards him.  Colonel Marsden, who commanded one of Sir Victor's cavalry brigades was given very specific orders.  "Find some draught horses, I don't care how you do it, but get a dozen horses back here by noon at the latest!!"As Marsden left, Sir Victor had 3 regiments of foot, plus a unit of commanded shot under Sir Nathanial Starkie, Rigby's Dragoons and Colonel Emmot's two regiments of horse, Shuttleworth's and Livesey's.  The yellow and green regiments were deployed on the outskirts of Bucklebury, Colonel Carter's regiment was held in reserve in the village centre.  Lloyd's commanded shot took up positions in the buildings whilst Rigby's were deployed in Norton Wood.  Emmot was ordered to station his regiments on Gorse Hill where they could get a clear view of the Royalist forces.  With his dispositions made, all Sir Victor could do now was to await the return of Marsden with the draught horses.

Sir Victor in Bucklebury
For his part Lord Melchett was confident of success.  He had five units of foot in two brigades, Molyneux's ( 2 regiments) and Gillibrand (3 regiments), with three units of horse under Duxbury. Two of the cavalry regiments were small, but it gave the Royalists a little more flexibility.  Gillibrand on the right was to advance straight towards Bucklebury pinning the defenders in place, whilst Molyneux on the left was to advance past Norton Wood and then attack the defenders in the flank. For their part, Duxbury's cavalry were to drive off the Parliamentarian horse before supporting the infantry.  Lord Melchett was already anticipating the prospect of a hearty meal at the inn in Bucklebury.

Gillibrand prepares to advance
The Royalist advance was led by Duxbury's cavalry who cantered forward towards Gorse Hill. Shuttleworth's, Emmot's leading regiment hesitated and seeing this indecision Duxbury's front line charged up the gentle slope of the hill.  As they closed on the Parliamentarians they received a feeble volley of pistol fire which they ignored.  Tyldsley's and the Kelhamshire Horse crashed into Shuttleworth's and in no time the latter were driven back in disorder.  Fortunately, Livesey's in the second line retained their formation and when Tylsley's swept forward in pursuit they were sharply repulsed.  (The Kelhamshire Horse had not pursued as they were shaken by their losses).  Seizing the advantage, Livesey's charged and overwhelmed the Kelhamshire Horse who routed.  Livesey's now attacked Tyldsley's and also drove them back.  Not a good day for the vaunted Royalist cavalry.

The Kelhamshire Horse are driven back by Livesey's
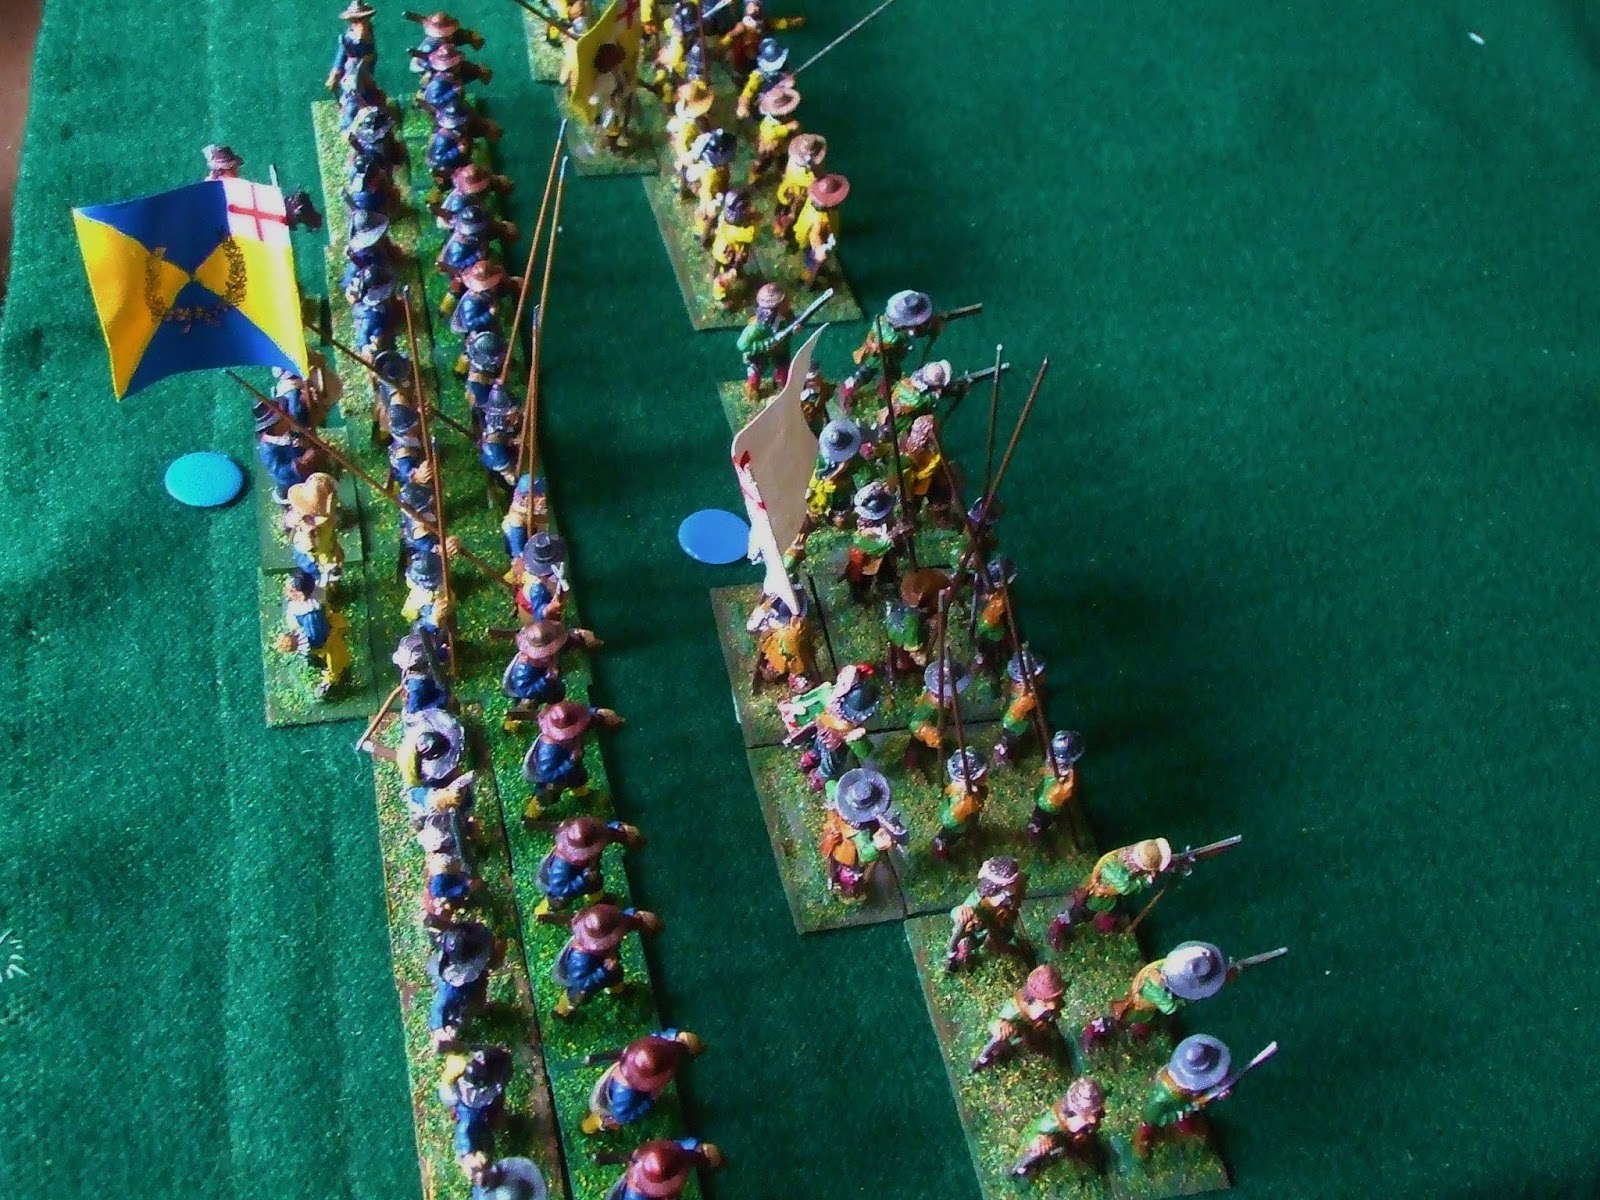
On the flanks, the Royalist foot had been advancing towards Bucklebury.  Molyneux, on the left, was being cautious; his largest unit, Newsome's, was newly raised and he didn't want their first experience of battle to be one which would shatter their morale.  Typically, it was this unit which came under fire first.  Rigby's dragoons began sniping at them from the woods.  However, their commander Colonel Josiah Newsome responded  in just the right way; realigning the ranks and then advancing steadily towards the dragoons with levelled pikes.  Rigby was too experienced a soldier to take on such odds. With a final flurry of shots his men withdrew into the woods and then made their way back to their mounts before pulling back to cover the flank of the Green regiment outside Bucklebury.  On the right, Gillibrand pushed forward towards the cornfield which was held by the Yellow regiment.  Assheton and Broughton were in the lead with Gerard in reserve.  After an exchange of volleys the two Royalist regiments charged and ignoring the final volley from the Parliamentary foot closed for a melee.  Even with the advantage of the ground the Yellow regiment could not maintain its position and it had to fall back to the outskirts of Bucklebury.  As the victorious Royalists crossed into the field they became disordered and this gave their opponents just enough time to reorganise their lines.

Assheton drives off the Yellow regiment
In the centre the cavalry melee continued.  The victorious Livesey's were charged by Clayton's regiment and driven back.  As the victorious cavalry followed up they ran into Shuttleworth's who despite being caught at the halt  managed to maintain their position, forcing the Royalists to fall back. Again both sides now paused to regroup.  When Duxbury resumed the attack he had support from Gerard's regiment and also Tyldsley's returned after being rallied by Lord Melchett.  Emmot decided that the odds were now stacked against him and he decided to pull back.  His intention was to support the open right flank of the Royalist position, but Shuttleworth misunderstood his orders and fell back towards the other flank where he got in the way of Carter's regiment which Sir Victor had ordered forward to support the Yellow regiment.

Shuttleworth's get in the way
Sir Victor's mood was not improved when Gerard's regiment took full advantage of the confusion within the Royalist force to advance right up to the village and attack the houses held by Lloyd's commanded shot.  The outnumbered Royalists did their best, putting up a stout resistance, but eventually they were driven back into the village centre and the disorganised mob flowed past the wagons and down the road towards Kelham.  On the Parliamentary right, the Green regiment had been attacked by Taylor's regiment with Newsome's in support.  The defenders had greater firepower, but when it came to combat, the greater numbers of pike on the Royalist side prevailed and the Green regiment retreated.  Sir Victor hurried to rally them, desperate to try and hold the village. He could not afford to give any more ground or the guns and wagons would be lost.  Where the **** was Marsden!

High water mark of the Royalist advance
As if in answer, a trumpet call rang out.  Turning, Sir Victor saw the welcome sight of the leading troopers of Marsden's command coming down the road.  Behind them was a group of draught horses and then a second regiment of cavalry.  The arrival of these reinforcements put new heart into the forces of Parliament.  The Yellow regiment together with Lloyd's held off attacks from Gerard, Broughton and Assheton.  In a final throw of the dice, Lord Melchett ordered Tyldsley's to charge Lloyd's regiment, hoping that the horsemen would break through and at least drive off the replacement draught horses.  However, Lloyd's men stood their ground and repulsed the attack.  With the Green regiment reformed and cavalry massing on his flank Molyneux felt he had to pull back.  It had been a close run thing, but Sir Victor had saved the guns and supplies.  |Lord Melchett could only ponder what might have been.

Marsden oversees the departure of the supplies and artillery
A close run game, made a good deal closer, (too close for me as Parliamentary commander) by Marsden's tardy return.  My cause was helped by the Royalists suffering several 'disorder' results due to crossing obstacles which slowed their pursuit of my defeated troops.  One innovation was to vary the shooting and melee factors for the infantry regiments in line with their size and also the pike/musket ratio.  It seemed to work quite well and we will try it again soon.


Tuesday 5 April 2016

Battle in the Straits - a Russo-Japanese naval game

It has been quite some time since Steve and I had a naval game, so as a change from Lion Rampaant and Pike and Shotte we dusted off the models and went east.  As can be seen from the photograph, a small island divides the Qundao straits.  In the distance the channel leads up to Port Arthur and a Russian naval squadron can be seen steaming towards the open sea.  The Japanese are trying to lay mines in the channels to avoid any disruption to their trade routes by the Russian fleet.  If they can mine both channels it is a Japanese success, one channel a draw, no channels a Russian success.  The dice decreed that I should command the Japanese fleet, 2 battleships, 2 cruisers, a minelayer and three destroyers.  Opposing me was a similar sized Russian fleet.


My plan was to try and mine the eastern (righthand channel) first and then try to mine the other one. I therefore sent the the two cruisers towards the western channel at a leisurely pace, hoping to draw part of the Russian force in that direction.  Once the enemy were committed to the western channel, the cruisers were to increase speed and move towards the eastern channel to support operations there.

The Japanese squadron heads towards the straits
At first things seemed to be going to plan; the cruisers moved to the west and the destroyers moved forward to protect the large ships from the enemy destroyers  I placed the minelayer at the rear of the column out of harms way and steamed north towards the eastern channel.  Even better, the Russians split their force, sending two ships towards the western channel, what could possibly go wrong?  I was soon to find out.

The two destroyer flotillas quickly closed the range and opened fire on each other, the Japanese got slightly the worse of the exchanges and I foolishly decided to pull my destroyers back to preserve their torpedo capability (if a destroyer suffers too much damage it cannot launch torpedoes).  This opened the door for Steve, who promptly pressed home an attack on my leading battleship, the Mikasa.  The Borodino had already engaged the Mikasa at long range and a 'lucky' shot had knocked out the gunnery control, reducing the effectiveness of the  Japanese ship's  salvoes.   Now, with every gun that could bear the Mikasa was trying to sink the attacking destroyers.  One was driven off, badly disabled, but the other managed to fire a torpedo and this hit its target causing substantial damage.


The torpedo attack on the Mikasa
Undaunted, I ploughed on hoping that I could at least seriously damage the Russian battleships.  One, the Navarin exchanged broadsides with the Mikasa and the Fuji and was fast approaching the minelayer, so that was ordered to make full steam away from danger.  My destroyers, after sinking their opposite numbers attempted to come to her aid, but they were too late.  One of the Russian cruisers in the western channel, the Bogatyr, opened fire at long range.  The shell hit, causing a small fire.  As the crew laboured to douse this, a salvo arrived from the Navarin.  The minelayer staggered under the impact of the heavy shells and when a second salvo hit the ship disappeared in a massive explosion.

The destroyer flotillas engage
With all hope of a successful outcome gone, I turned my remaining ships for home. The Mikasa and Fuji had pounded the Borodino but had not achieved a decisive result, other than starting a fire.  In return the Mikasa had had its fore turret knocked out and the Fuji had lost its gunnery control. My cruisers had managed to inflict some damage on the Russians, one of their cruisers being on the verge of foundering, but the price was heavy, the Akashi being sunk.  So with two ships lost and my flagship requiring a lengthy refit it was hardly an auspicious day for the IJN.