Tuesday 29 September 2015

Lathom convoy; an ECW scenario for Pike and Shotte

Rather than return to Kelhamshire, I decided that the latest ECW game should have some element of historical fact about it.  The whole scenario was fictitious, but there was a protracted siege of Lathom House during the ECW.  For the purposes of the scenario the Royalist commander of Liverpool (Sir Roderick Murgatroyd), has organised a convoy of supplies to bolster the defenders of Lathom House. The Parliamentarian commander (Ferdinando Assheton),  prosecuting the siege has got wind of the convoy and ordered part of his force to take up a blocking position at a vital bridge.

This is a general view of Assheton's deployment.  In the distance on the Parliamentarian left are the two regiments of Starkie's brigade of horse; in the centre are three regiments of foot under Assheton's command and by the road in reserve are Shuttleworth's brigade of horse.  A unit of commanded shot is deployed on the far right covering the ford.  By the bridge is a light gun and in the toll house is a unit of dragoons.  The river is fordable by both horse and foot (not artillery or wagons, they must use the bridge), but there is a risk of disorder.  Assheton's objective is to stop the convoy leaving the table towards Lathom.
Sir Roderick has deployed Hoghton's brigade of horse (two regiments) on his right, Gerard's foot (3 regiments) is in the centre accompanied by a light gun and Tyldesley's horse (two regiments) are facing the ford.  On the road is the convoy, under the command of Sir James Moylneux.  The column is led by a unit of dragoons; with the wagons, escorted by two units of commanded shot, following. With the sides fairly evenly matched, Sir Roderick realised that forcing a crossing would not be easy; he therefore pushed his dragoons forward, intending to occupy the toll house.  In the centre his artillery moved forward to 'soften up' Gell's regiment, prior to a general advance by Gerard's brigade. He ordered his cavalry to move forward and engage the enemy horse with pistol fire, but not to cross the river.
As the dragoons trotted down the road and began to deploy they came under fire from the defenders of the toll house; surprised, they fell back and requested reinforcements. To their right, Hoghton's men had moved up to the river, but Starkie's men had moved back out of range.  On the Royalist left, the gun was quickly in action and soon found the range causing significant casualties in Gell's regiment.  Tyldesley's men remained a couple of moves back from the ford, waiting for the Parliamentary infantry to be forced to fall back due to losses.


Sir Roderick ordered the dragoons to move round the toll house and support Hoghton's cavalry by the river.  He also ordered one unit of commanded shot from Molyneux's command forward, to take on the Parliamentary dragoons in the toll house.   The commanded shot were to be supported by the green regiment from Gerard's brigade.  Assheton had begun to move his infantry more to the centre of his position to oppose Gerard's brigade, but he had had to halt Cunliffe's regiment to counter the Royalist dragoons.  Cunliffe rather exceeded his orders, because, not only did he reform to face the dragoons, he then advanced across the river and charged them!.  Not surprisingly the dragoons did not wait to receive the pike charge, firing a parting volley, they quickly mounted their horses and fell back.  In the process they fell into disorder and Sir Roderick had to gallop over and in concert with Sir James Molyneux rally them.

However, Cunliffe's impetuosity had placed his unit in a bad position.  Intending to support the dragoons in the toll house, he now instead found himself threatened by Hoghton's horse.  To protect themselves, the unit formed hedgehog, but now were vulnerable to fire from the second commanded shot unit and the reformed dragoons, in addition to the pistols of Hoghton's troopers.  They could expect no support from the dragoons in the toll house who were trying to beat off a determined assault by the green regiment.  In the end the dragoons were successful, but it was only a temporary respite.

Struggle for the toll house
In the centre, Gell's regiment  was struggling.  Losses from the Royalist artillery were increasing and, when Gerard moved forward Taylor's regiment the pressure increased further.  A devastating first volley from the Royalist infantry broke the defenders' morale and they routed from the field, leaving a gaping hole in Assheton's line.  Sensing that now was the time, Sir Roderick ordered Tyldesley to advance across the ford to support Taylor's men.  As the Royalists reformed after crossing the ford they were charged by Shuttleworth's leading regiment.  They had time to counter charge and won the ensuing melee, but were disordered in the process.  This gave just enough time for the Parliamentary horse to pass through their supports and begin to reform.  Assheton's commanded shot now began to fire on the Royalist cavalry and with casualties rising and threatened by a fresh regiment of Parliamentary cavalry the Royalists fell back across the ford.  Assheton was saved by Gerard's red regiment being very slow in moving up to support Taylor's men.  The delay enabled Assheton to get the yellow regiment in place to support his artillery and when Taylor did advance he was met by a veritable storm of musketry  and artillery fire.  Disordered by the river crossing and shaken by their casualties, the  Royalist infantry routed.  It required all of Gerard's efforts to halt them.

Starkie caught in flank
It seemed that the advantage lay with the parliamentary forces, but, on their left the pendulum began to swing in favour of the Royalists.  Cunliffe's regiment, thinned by musketry fire broke and routed across the river.  As the infantry milled around in disorder the Royalist cavalry gathered sensing easy prey.  Starkie placed himself in front of one of his regiments and crying 'Follow me brave fellows' plunged into the river with the intention of charging the royalist horse assembled on the far bank.  His men followed him across and the impetus of their charge enabled them to overcome their opponents. To his right, Starkie saw the commanded shot firing at the toll house and beyond them the supply wagons.  Waving his sword above his head he led his men towards the wagons, hoping to win the day with a decisive charge.  The Parliamentary cavalry closed on the infantry, but suffered heavy casualties from a closing volley.  They also lost men to fire from the dragoons who covered the flank of the musketeers.  Their charge lost its momentum and the melee was indecisive.  This allowed time for Hoghton to reform his men and lead them in a charge against the flank of Starkie's cavalry. Caught at a disadvantage, Starkie's men broke, their gallant commander losing his life in the rout.

Hoghton's remaining regiment now crossed the river and charged Starkie's second unit.  The melee was indecisive and both units fell back to reform.  Hoghton's men accomplished this quickly and charged again.  Their target this time was Cunliffe's regiment which was still trying to recover from their losses.  They stood no chance when the Royalist cavalry hit them, the majority turned and ran, a few stood, but they were cut down.  Hoghton's second regiment, fresh from their victory over Starkie now joined the fray and together the two Royalist units charged the last cavalry on the Parliamentary left.  If this attack succeeded few, if any of the Parliamentary army would escape.  Against the odds, fighting like demons, the Parliamentary cavalry drove off both their assailants, buying Assheton a little more time.

Cunliffe's men routed
The end was nigh for the Parliamentary dragoons in the toll house.  Casualties were rising and a second attack by the green regiment was imminent.  As the Royalist infantry charged home, the dragoons resolve cracked.  Assheton galloped over to try and rally them but he was felled by a stray bullet from a volley by the Royalist commanded shot.  The dragoons took to their heels and ran from the field.  Attempting to restore Parliamentary fortunes, Shuttleworth led his cavalry forward, but his leading regiment was hit in flank by Tyldesley's men and driven back in disorder.

With their general dead, four units routed from the field and the majority of the remainder in a shaken condition, the Parliamentary army quit the field, allowing the convoy to progress to Lathom.

Another seesaw action under the Pike and Shotte rules.  For this battle we watered down the 'disorder' result, For trained regiments it required 2 6's to impose disorder by  musketry and/or artillery.  This meant that in the whole game we only had 2 or 3 instances where musketry/artillery inflicted disorder, the majority of disorder results were caused by melee.  We felt that this gave a better game, though perhaps we may remove the recovery roll (the extension of the elite unit bonus instituted for the Gloucester game link   

Sunday 20 September 2015

Further thoughts on rules and another outing

Both 'Black Powder' family and 'Pike and Shotte' have a 'disordered' status.  This is the one aspect of the rules which seems to generate the most discussion.  Steve and I are familiar with the 'shaken' status in 1644 which is also generated by rolling a '6'.  However, the virtue of 1644 is that you only need to roll one dice, so the odds on obtaining a 'shaken' result remain constant at 1 in 6.  With BP and P & S you can roll 3 or even 4 dice, thus the odds on getting a 6 increase. So you can end up with the majority of your units disordered.

Steve and I have looked at this and he came up with the idea of extending the recovery roll from elite troops to all troops.  (In P & S at the beginning of your phase of movement, elite troops can roll to recover from disorder and thus, if successful, move normally.)  We used this in the large ECW game following the St Helens' show and it did help the game flow better.  The roll is modified by the quality of the troops; raw recover on a 6, trained on 5+ and elite on 4+.  A further modification would be to adjust the number of 6s required to inflict the disorder; 3 for an elite unit, 2 for trained and 1 for raw.  This total would be the sum of all the fire received by the unit during that firing phase.

Taking advantage of the good weather this weekend my wife and I visited Rufford Old Hall, which is run by the National Trust.  In the old Tudor period hall is a small collection of armour gathered by the Hesketh family in the 19th century.


As you can see the helmets come from a  variety of countries and periods.  Some of the attributions are suspect; this was said to be a dragoon breastplate from the Napoleonic period.


To close, a few more photos of Steve's Sudan collection used in the last game.


Thursday 17 September 2015

In the desert once again

For the last month a combination of holidays and other commitments has called a halt to our usual weekly game.  Just before the break Steve organised a Sudan scenario using the Battles for Empire rules as usual.  The Imperial troops are trying to recover a cache of weapons which the dervishes have obtained after successfully ambushing a supply column.  The location of the weapons is not known to the Imperial player, but it is likely to be in one of three settlements.  As we have the Dervish forces hidden and Steve sets up the table before I arrive, I usually take command of the Imperial forces.  With two units of cavalry, four units of mounted infantry and two guns (one machine gun and one artillery piece), I did not have sufficient fores to attack across the full width of the table, so I concentrated on my left, leaving a small force to cover my flank.

The table from the Imperial right
As my leading unit of mounted infantry probed towards the village on the left it was attacked by tribesmen lurking in some broken ground.  Fortunately, they manged to dismount and form a firing line.  Their rapid fire stopped the tribesmen in their tracks and drove them from the field in disorderly rout.  However, in the centre, another unit of mounted infantry  was ambushed by two units of Dervish  infantry and cut to pieces before supports could come to their aid.

The infantry beat off a Dervish attack
After this the balance of the game swung back and forth.  Steve used his numerous cavalry to threaten my flanks and rear and the Lancers were fully employed dealing with one crisis after another.  Where I manged to establish a firing line with sufficient open ground before it, the Imperial troops managed to deal with the Dervish charges.  When the charges came in from close range I tended to suffer heavy casualties in the ensuing melee.  Although the imperial units were tough, repeated charges wore them down.

The Lancers in action
By the end of the game I had managed to capture one village and drive the defenders from a second (the Royal Artillery really earned their corn in this action, subduing the enemy artillery and giving close support to the infantry).  However, losses had been so severe that to attack the third village (which happened to be the location of the weapons), was beyond the remaining troops.

Dervish success
In the post-game discussions Steve and I discussed the relative strengths of the Dervish and Imperial troops and the latter's susceptibility to a gradual erosion of their strength.  With that in mind we decided to run the scenario, but with a different set of rules.  The choice was the "Blood on the Nile" supplement to the Black Powder  rules.

We used the same OOB and once again I took the part of the Imperial commander.  This time I opted to probe both flanks, ignoring the centre.  The Egyptian mounted infantry and cavalry, plus the machine gun pushed towards the village on my right, whilst three units of British mounted infantry were to attack the village on the left.  This left the Lancers and the Royal Artillery in the centre to support whichever flank needed help.  It soon became apparent that it was the Egyptians  who would need the help.  The mounted infantry had dismounted and formed line before moving forward and the cavalry had moved to cover their flank.  However, the machine failed its activation roll and its firepower would be greatly missed.  A unit of Dervish infantry broke cover and charged the Egyptians from close range.  Their closing volley was ineffectual and the Egyptians then failed their break test, falling back in disorder.  Before they could recover, they were charged and again broke, this time in rout.  On their flank the cavalry had been attacked by another unit of Dervishes.  They had counter-charged, but had lost the melee; so they too fell back, leaving the machine gun crew as 'Billy no mates' facing two enemy units.

Fortunately, the Lancers were able to intervene, (the long move distances being a great help), and quickly dispatched one unit of Dervishes.  The other was driven off by the machine gun, which then jammed.

Egyptian cavalry attacked in flank

Meanwhile, I was making slow progress on my left towards the village.  A Dervish attack was held, but it pushed one unit out of the firing line.  The two remaining units fired at the defenders of the village for a couple of rounds, but could make no impression.  As a last resort I ordered a charge, one unit went in, but the other held back, surely the attack was doomed?  Against the odds the Imperial troops prevailed and then for good measure beat off a counter attack, even without support !  As a bonus Steve's units routed, leaving me in possession of the village; which happened to have the cache of arms !!  Mission accomplished !!!

Once again we sat down and discussed how things had panned out.  "Blood on the Nile" gives a very different sort of game.  Move distances are vast (up to 54" for cavalry, which even on a 8 x 6 table seems over generous).  The ratings for the  Egyptian troops seem a little low. It would be necessary to have mixed brigades of Imperial troops,  without British units a whole brigade could be swamped. (especially with my ability to roll low dice).  Rifle fire seems ineffective.  Not one Imperial unit caused a disorder in a Dervish unit by rifle fire during the whole game (though allowance should be made for my dice rolling, 6's are like hen's teeth as far as I am concerned).  The rules also have large Dervish units (4 times the size of Imperial ones, up to 60 figures strong).

One definite improvement was the ability to "rally off" casualties; which meant that a unit to step  out of the action, recover and then join the firing line.

So the jury is out on "Blood on the Nile".  I suspect that we will tweak the rules a little, try out some more scenarios and see how things go.


Tuesday 1 September 2015

Sealed Knot at Chester

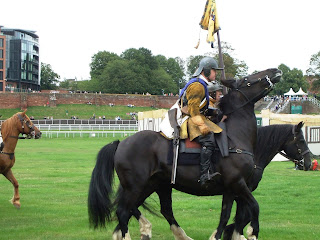
I can't remember the last time I went to a Sealed Knot event, it is certainly a good number of years ago.  When I heard that they were mustering at Chester over the Bank Holiday it seemed like a good opportunity to go and watch.  The venue at Chester Racecourse was spacious and the living history encampment very interesting to visit.  I had expected the 'Knot' to be camped there as well, but because of numbers (I think), they were a couple of miles away and marched to the venue.

The battle was based on Rowton Heath and the spectators saw a reasonable approximation of a clash between two infantry forces.  There was a lack of cavalry, but then with the cost associated with the animals and the difficulty of organising large numbers of them; not to mention the H & S implications of having dozens of them charging around you can understand why.

There was plenty of noise and smoke and yet above it all the beat of the drums could be heard. Different rhythms for different orders, but the insistent driving beat for the advance really stood out. You got a clear sense of the importance of those drummers.  Overall, a really good day out.  The action was a little confused so I will just add a few photos of the action, rather than a description of the battle.  There are several posts already on Youtube regarding the action this is one

Waller's Horse

Royalist Infantry

Pikes preparing to melee

Rupert's musketeers

Cavalry melee

Parliamentary advance

Frame guns
Scottish infantry